Wednesday 30 November 2011

HexEngine Mount

The HexEngine fitted to the tank bracket.

Glueing the heatsinks onto the tank

Monday 28 November 2011

Here is the Mantis at the end of the day with most of the power pack back together. I still need to finish the tank, but currently I'm waiting for a few parts from Stauff.


Tomorrow I need to size up the cooler return pipe, the cooler suction pipe and the case drain pipe. These are the last of the hydraulic cables that I need to re-place with the new layout. I also need to chase up Stauff, which are taking forever to get back to me with price and availability info on some of their products. I have the aluminium stand-off's for the tank and the seat being made by D&T, they should be with me some time this week. Also need to look at gluing the heat sinks to the back of the tank.

Bulk head Re-Assembly

I collected the bulk head frames from the powder coaters this morning and re-assembled the bulk head, tank and seat support.
 
Here is the relocated isolator switch and throttle control which can be reached by the right hand while seated. The throttle was previously located on the cab frame, but I think it is better off here so the cab can be removed if required. I'm going to look for a new home for the manometer also. 

Here you can see the rest of the electrical system reinstated. I have a few bit to finish with the electrics and then test it but its pretty much there.
A front view of the new tank without the seat

.

Friday 25 November 2011

New Seat

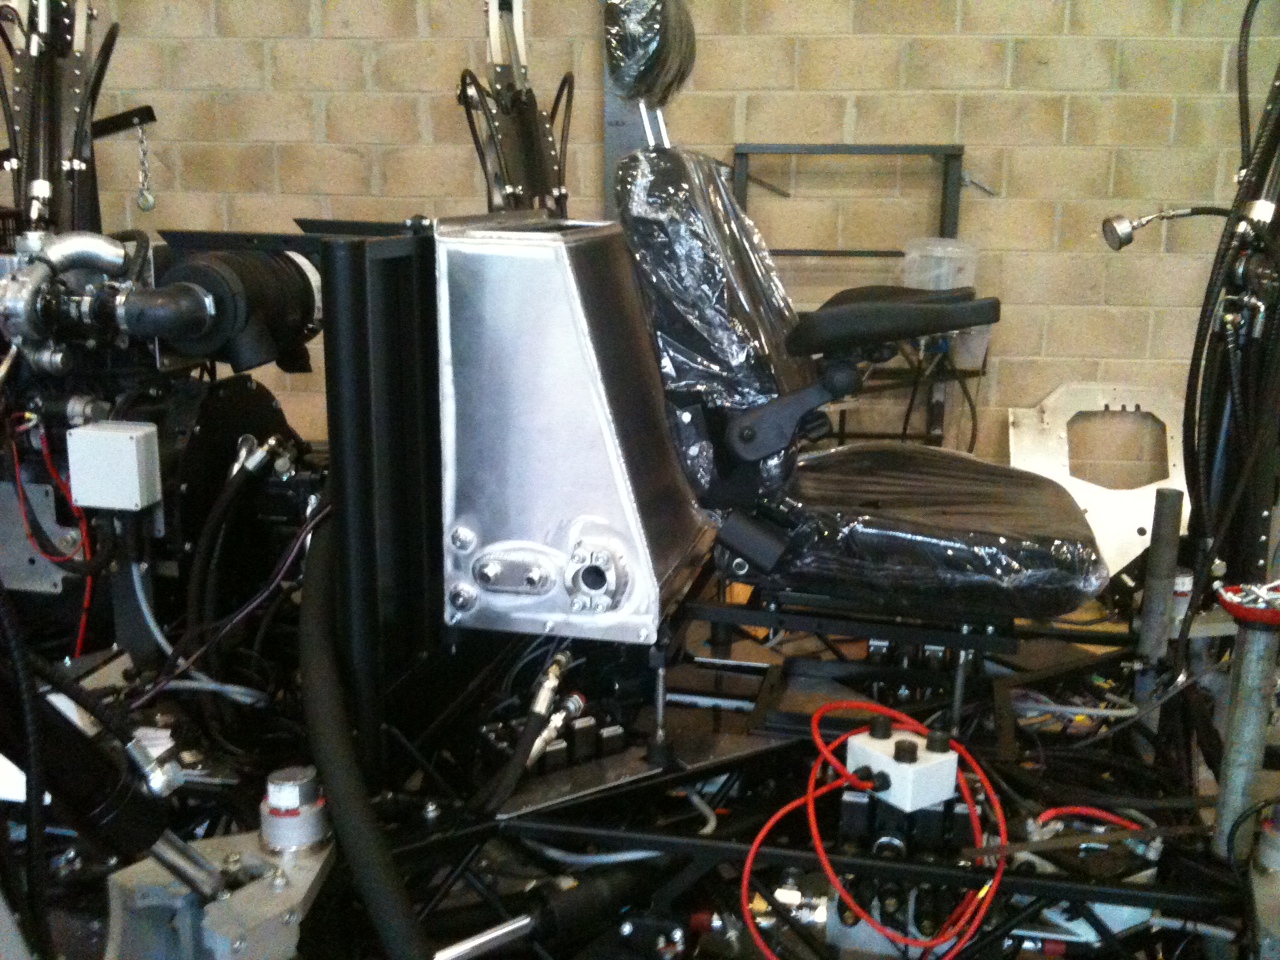
The new seat arrived today, this is virtually the same as the previous seat but does not come with the mechanical suspension unit. This seat only has the fore/aft adjust and recline. I took the head rest and arm rests from the old seat and fitted them without too much trouble, but for some reason this seat does not come with the lap belt fixing point, so I had to remove the back rest and drill a couple of holes. It's back together now with lap belt installed. With the new seat support and battery compartment underneath I had to get rid of the suspension unit, hence this new chair, which means a weight saving of at least 12Kg.

Also spent some time getting webots running on my Dell Linux machine ready for code development. Webots doesn't run that well on this machine, the frame rate is pretty slow but usable. However, it crashes out when resetting the simulation, which is a pain in the arse, so will need to spend some time looking into the reason.

Thursday 24 November 2011

Power distribution re-wire and battery box

I've just about finished re-wiring the power distribution box and the new link cable between the ECU and engine relay/distribution box. Just the ECU cable ends to crimp.
Here are the batteries in their new location under the seat bracket, with the battery isolator located next to the batteries. currently I have a ratchet strap holding the batteries in place, however I will replace this with a simpler buckle strap system as the ratchet buckle is a it bulky.

Tuesday 22 November 2011

Bulk head fitting test

Here is the bulk head with tank fitted, along with the battery tray and floor pans.
Here is the rear view with the power distribution box in its new home.

More chassis and tank shots

The chassis with bulk head and tank removed. Below is the tank fitted on the bulk head.

A helpful hand from a friend

My friend and colleague Adam Wright came in for a couple of days to help with the metal fabrication of the bulkhead and various other brackets for the oil cooler, tank and seat.
Here you can see the Mantis without the bulkhead fitted, It's been a while since I have seen the chassis looking so bare!

Friday 18 November 2011

New Foot Assemblies Complete

Finished the remaining foot assemblies, now just need to get them fitted, calibrate them, test them, re-write the hexengine to remove the fourth axis....etc..... 


Monday 14 November 2011

Tank

I got the tank loosely mounted into position to see how it looks, pretty good I think. Although I'm still tempted to try anodizing it black. However, I'm told the weld will come out a different colour and look bad.

Friday 11 November 2011

My first USB interface project

Nothing to do with the Mantis but this is my first USB micro controller project utilising a dsPIC and an FTDI USB interface chip. The FTDI chip is really easy to use and is working very well. I had to tweak some of the default settings on the chip to get the serial latency down as low as possible, but initial tests work well for my application.

Thursday 10 November 2011

New Foot Mounted On Leg


I picked up the new anodized foot and leg parts yesterday, and today picked up the rest of the components required to attach the new foot to the leg. The assembly went together well, only a couple of small issues that I soon overcame.
Here is the rest of the foot mechanism held in place with the M20 bolt.
I may have to make an aluminium cable guard to protect the two cables from damage. Otherwise the new design looks great!

New Foot Assembly

 The new foot assembly with the pancake load cell sandwiched between the ball joint and tibia mounting hardware.
The small box contains the strain gauge amplifier.

New Hydraulic Tank

I collected the new hydraulic tank today, looks ok! Apparently anodizing this would not be a good idea as the weld will come out a different colour, so I think I will leave it bare aluminium.
Inside the hydraulic tank.
Side view of the tank.

Tuesday 8 November 2011

The last of the tnk parts

Here are the remaining parts I required for completion of the hydraulic tank.  Te suction pipe I found on ebay, the 1.5" BSP threaded boss I had made by D&T Precision. These parts will be welded to the back of the SAE fittings as shown, prior to being fitted to the tank.

Thursday 3 November 2011

Don't leave the cnc machine unatended!

I should have learned this lesson by now, I left the machine skimming the outside face of the last of twelve of these parts.. and look what happened. I thought of having another made, but I think I will just use it as is to remind me :)

Picked up the new parts for the 3 axis leg from the waterjet company.

Above are the outer clamping plates, these are really just dressing, however, without them it leaves the steel structure of the tibia and some very sharp edges exposed. With these in place it finishes the end of the tibia nicely.
This is the main part of the 3 axis design. This part gets clamped between the two steel plates of the tibia. The M20 x 160 bolt holds the rest of the foot in place.

Wednesday 2 November 2011

Electrical strip down

I took the plunge and decided to move the distribution/fuse box. In it's current position it's being shaken to pieces by the engine, actually to be fair nothing has fallen apart bar the silicone shock mounts used to mount the box, however, I think it will be better in another location.

Tuesday 1 November 2011

Last of the fourth axis removed

Removed the left leg fourth axis ready for conversion, converted the remaining ankle sensors then got brave and decided to remove the two posterior metatarsus valves. This gave me an idea of how tricky it would be to add he A + B port sandwich valves to take pressure sensors. While the machine is stripped down and the valves are accessible I think it would be a good idea to fir the sandwich valves with the ports blocked, this way if I decide to add pressure sensors in the future I only need remove the plugs.. well and add a new loom to the valve control box... plus the 36 sensors that would be needed!