Friday 20 May 2016

Adding PiTFT Panel

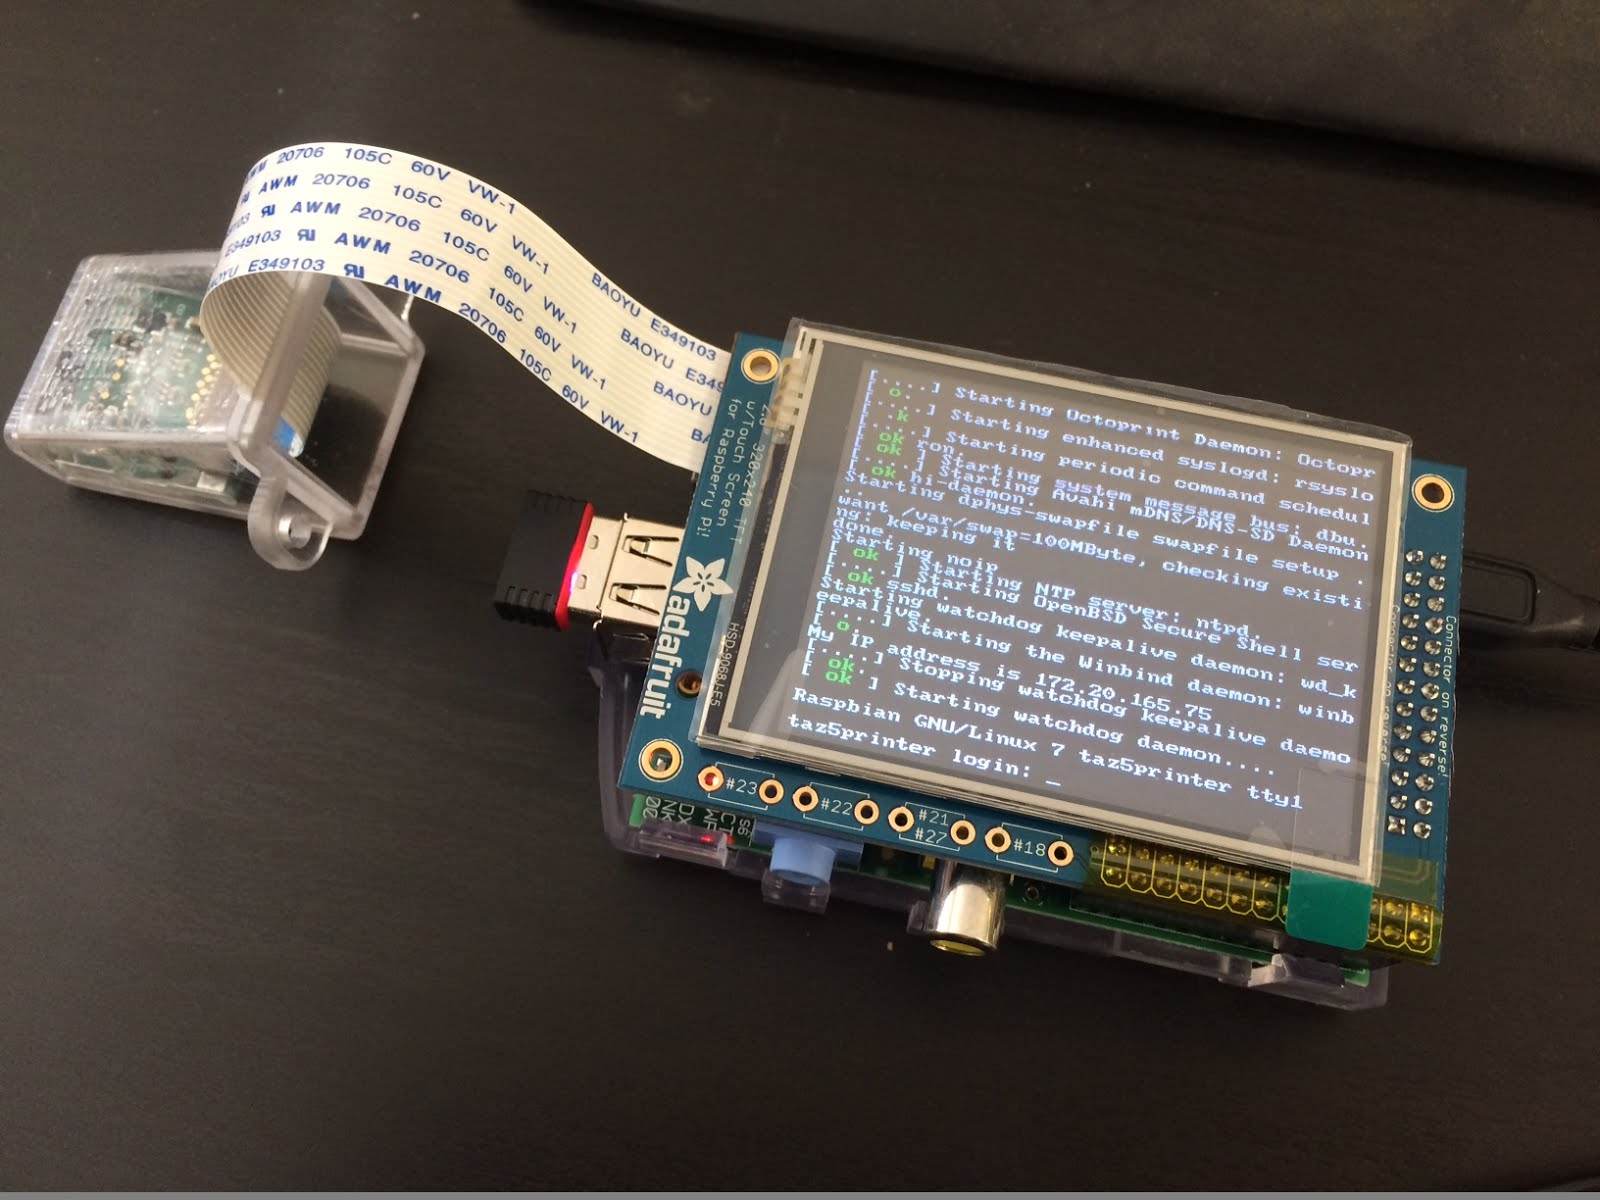
So next I'm going to add the Adafruit PiTFT panel. First I follwed this tutorial to get the panel working:

Adafruit PiTFT Install


Then follow this tutorial to install the OctoPrint interface:

OctoPiPanel Tutorial


Having got this all working, the python interface seems to be hogging the Pi processor ( 50 to 60%) and slowing everything down, so I'm going to remove it from the startup for now:

> sudo update-rc.d octopipanel remove


TAZ5 updated spool holder

Here is the updated spool holder. Works great! I put 6mm studding down the middle with a nut either end to add strength.


TAZ5 OcotPrint initial test

So I have ran my first print over octoprint. At first I didn't have much success, I tried to run the print by selecting a file from the SD card. Although the file loaded, I couldn't get it to start, when I pressed print heating did not start. Would like to get this working as I would imagine if the ocotprint server failed the SD print would continue?

Anyway, I did get a print working by simply dragging and dropping a gcode file created in S3D straight on to the interface, and printing locally. All worked very well, including webcam/time-lapse.

When annoying issue was that the cancel print button would wait for the last command to complete, so if the bed was heating, you couldn't do anything until it has finished the heating period. I got around this by adding the M112 E-Stop command into the Cancel script. This does the job but does also disconnect the printer.

TAZ 5 with OcotPrint running on Raspberry Pi

I've had a Rev B Pi sat around on my desk for at least 5 years now, and have been trying to find a use for it. So my latest desire is to have it setup on the Taz to run OctoPrint utilizing the webcam for remote viewing of the print progress. This post is here simply for my own reference so that I can repeat various steps to get the Pi up and running again should I need to.

There is an SD image already created based on Raspbian called octopi. This is probably the simplest way to get started, however, I already had Raspbian installed and would rather do things manually, so I started by following these steps here:


Setup on a Raspberry Pi running Raspbian


I configured as per the instructions, I do remember running into a missing library at some point, but can't think what it was, something to do with python-dev?? anyway, a google search turned up the answer. I did the following:

  1. Install OctoPrint
  2. Add mjpg_streamer for webcam
  3. Configure to start on boot as server
  4. Add system commands to ocotprint interface
  5. Make everything accessable on port 80

Some important file locations:

Webcam configuration:

~/scripts/webcamDaemon
I modified the webcam resolution and frame rate as I found it was swamping the wifi link on the Pi, and would often kill the network interface. My configuration looks like this:

camera_raspi_options="-fps 4 -x 640 -y 480 -q 20 -sh 100"

Edit using: nano ~/scripts/webcamDaemon

The hidden Ocotprint configuration file:
~.octoprint/config.yaml

Edit this file using
nano ~.octoprint/config.yaml
haproxy config files:
/etc/haproxy/haproxy.cfg
/etc/default/haproxy


Currently my file has some modifications to add actions to the OctoPrint interface so that I can start and stop the webcam stream, and reboot the system. Also this file contains webcam configuration, which can be accessed and changed via the OctoPrint interface. However, for changes to take effect OctoPrint has to be re-started and the browser will need refreshing. Additions to my config file are as follows:

  system:  
  actions:  
  - action: streamon  
   command: /home/pi/scripts/webcam start  
   confirm: false  
   name: Start Video Stream  
  - action: streamoff  
   command: /home/pi/scripts/webcam stop  
   confirm: false  
   name: Stop Video Stream  
  - action: reboot  
   command: sudo reboot  
   confirm: You are about to reboot the system  
   name: Reboot  
 temperature:  
  profiles:  
  - bed: '110'  
   extruder: '245'  
   name: ABS  
  - bed: 60  
   extruder: 180  
   name: PLA  
 webcam:  
  ffmpeg: /usr/bin/avconv  
  flipH: true  
  flipV: true  
  snapshot: http://127.0.0.1:8080/?action=snapshot  
  stream: http://mywebaddress.no-ip.org:8080/?action=stream  
  watermark: false  


Usefull stuff:

To start/stop services:

sudo service octoprint {start|stop|restart}
sudo service haproxy {start|stop|restart}
~/scripts/webcam {start|stop}


So what next. I setup a no-ip account so that I could have a web address I could access from anywhere that would re-direct to my OctoPi. To do this I installed the noip service on the Pi, which updates the dynamic IP address to my no-ip hostname, instructions here:

Install no-ip DUC on Raspberry Pi

Or this one, which has the auto start instructions:

No-Ip with auto start on boot

I changed the default hostname of raspberrypi to somehting else using this guide:

Change hostname

As yet I have not got an easy way to find the OctoPi on the network without knowing it's IP address. working on this...


Tuesday 17 May 2016

TAZ 5 Cabinet Temperatures

Just ran a 30min print and noted the temperature increase of the cabinet. So the starting ambient temperature was 16 degrees, and after 28 mins of printing the internal cabinet temperature was 28 degrees. I think my original cardboard box version was getting to about 40 degrees internal. I'm going to leave the heated bed on for another 30 mins and see what it gets to. Of course cardboard is a better insulator than acrylic!


So to increase the internal temperature, I laid piece of cardboard on top of the top acrylic sheet. The printer has been running for a few hours, but had settled at 31 degrees. With the cardboard in place it's now just above 38.


TAZ5 cabinet completed

Here is the finished cabinet.
Width: 650mm
Depth: 650mm
Height: 580mm


I have changed the spool holder idea, now the top rack is for storage only. I added another extrusion arm inside the cabinet, this uses the existing guide nice to another support strut, and means the printer can be used easily without the case.


Plenty of room on top of the cabinet for storage and laptop etc. The acrylic does bend a bit, so I may look into more internal support.


I'm going to leave the active cooling for now, and just see how warm the cabinet gets during printing. I have the parts ready to install, but this does make the build more complicated, and may not be necessary.

TAZ 5 fitting the acrylic sheets

Although the sheets come cut to size, the corners need notching out so as o clear the cube connectors holding the extrusion together. I roughly marked each corner and cut them out on a band saw fitted with a metal cutting blade.


Monday 16 May 2016

TAZ5 cabinet finished spool rack

Here is the completed cable rack. The idea is that the front four reels will all go down through the top cover through a single hole.. Or I may just make the front one feed through.


TAZ 5 Cabinet Doors

Cutting the doors from a single sheet of 4mm acrylic in my pacer CNC router


TAZ 5 cabinet material spool rack

This is my idea for the spool rack.


Using these 20mm clamps


 I'll put a piece of 20mm aluminium tube about 200mm long centres in the clamp. Then a reel goes either side of the clamp. I'll have three clamps so can store six reels. The front four reels will all align with the spool entry hole in the top of the cabinet, allowing easy switching between four material colours.

I've printed clamps to stop the reels faking off. You can buy these in aluminium or steel but they are expensive!


TAZ 5 Cabinet acrylic

Acrylic has arrived! Time to chop the corners out and for it.


Friday 13 May 2016

TAZ5 cabinet thermostat

Printed a bracket to hold this LCD thermometer. The thermometer has an external probe on about 1m of cable that I'll place near the rear middle of the cabinet.


TAZ 5 Cabinet temperature control

I have a basic plan to add some kind of cabinet temperature control using a 120mm PC fan and a thermostat PCB I picked up on eBay.


I'm going to try the cabinet without the fan first, and upgrade if required.

Also 3D printed an exhaust port for the fan, so the toxic exhaust air could be ported out a window!


TAZ 5 Cabinet

I've installed three strips of LEDs around the inside edge of where the doors will go. Also another difference with my design is that I went for twin split doors rather than one big door, which looked kind of awkward to open due to the size!


Lulzbot TAZ 5 cabinet

Having had a great experience with my TAZ5 so far, I recently tried some large parts in ABS, and ran into trouble with splitting and warping. So I decided to try adding a cabinet to keep the part temperature up. To do this I used the box the TAZ came in, which made a huge difference, but was not very scientific, so decided to build one.


I had seen the design on the Lulzbot site, which I quite liked, but decided to go a slightly different route. The main differences would be a slightly smaller cabinet with material reels on the outside for easier swapping. And an air intake port for the electronics. Although the electronics are supposed to be happy up to 70 degrees, I'd rather pull in cool air to them. If this cools the cabinet too much then I may port the air out of the electronics box also.