Thursday 16 December 2010

Updated Simulation

I have spent the last week updating and reconfiguring the Webots simulation of the Mantis. I have go to the point where I need to start testing some of the changes I am making to the walking algorithms and in particular the terrain adaptation. I was considering trying to get the 1/10 scale Mantis up and running again but decided to give the simulation another look to see if I could get the contact sensors running better and reduce the latency between Webots and the HexEngine. Currently the two are linked via TCP/IP and I am streaming data using UDP. I was thinking of writing a FACU emulation mode within the simulation that could be linked to the HexEngine via a 460Kbps serial link, which should reduce any latency further and guarantee packet ordering, but having fiddled around with the UPD code for a day or two while simultaneously adding feature to the model things are currently working pretty well!

New simulation model takes on a tough slope!
 I have added some very useful LED's to the model, one at each joint on the leg, one on the foot and one at the ankle. These give a great visual indication of joint limit warnings and errors, and contact detection respectively. I have also cleaned up the Webots controller code so I can switch on and off features using the keyboard instead of re-compiling.


I have two versions of the Mantis, one with terrain which has been really useful for testing my algorithms, and monitoring behaviour. Still getting contact latency between the simulation and the Engine, and the feet sometimes disappear below the terrain and get stuck! but generally the results are good, as you can see in the images, I'm pretty sure we won't have the power or grip to climb a lope as shown!

I don't thing the real Mantis could have climbed that slope!

Tuesday 14 December 2010

GreyHill 3D65 display

I have borrowed a 3D65 from EAO for evaluation purposes. It arrived today and already I have the unit up and running and the eVC4 tool suite installed. However I couldn't get connected to the 3D65, and couldn't find any LAN setup or configuration. Upon contacting Grayhill support, it turned out I had a cut down OS with no LAN support, they sent me a new file which I have installed and the LAN and debug link to eVC4 is now working.


Lest hope this never happens

This is why we simulate changes prior to testing on the machine :)

Sunday 12 December 2010

Belly of the Beast!

I just found these images Josh took the day we moved from Wokingham, he placed his camera on the floor under the Mantis as it was lifted onto the truck, great shot of the guts.

Right middle is the accumulator, centre blue item is the flow meter, above is the tank, front silver blocks are two of the six manifolds.

Thursday 2 December 2010

November round-up, and the snow has come early!

Snow has come early this year, so I have not been able to get in to Romsey to the new unit, but at least it has given me a chance to catch up on some blog!

Outside my house in Winchester 9am, 2/12/2010
Its been quite some time since my last post after our moving day at the end of October. I have settled in to the new unit, I have a portacabin inside the unit which provides a warm haven for me to write software which predominantly what I have been doing for the last month! Hence very few blogs, as I find talking about software a little dull, far less interesting than actually building the machine, although without it the machine is nothing.


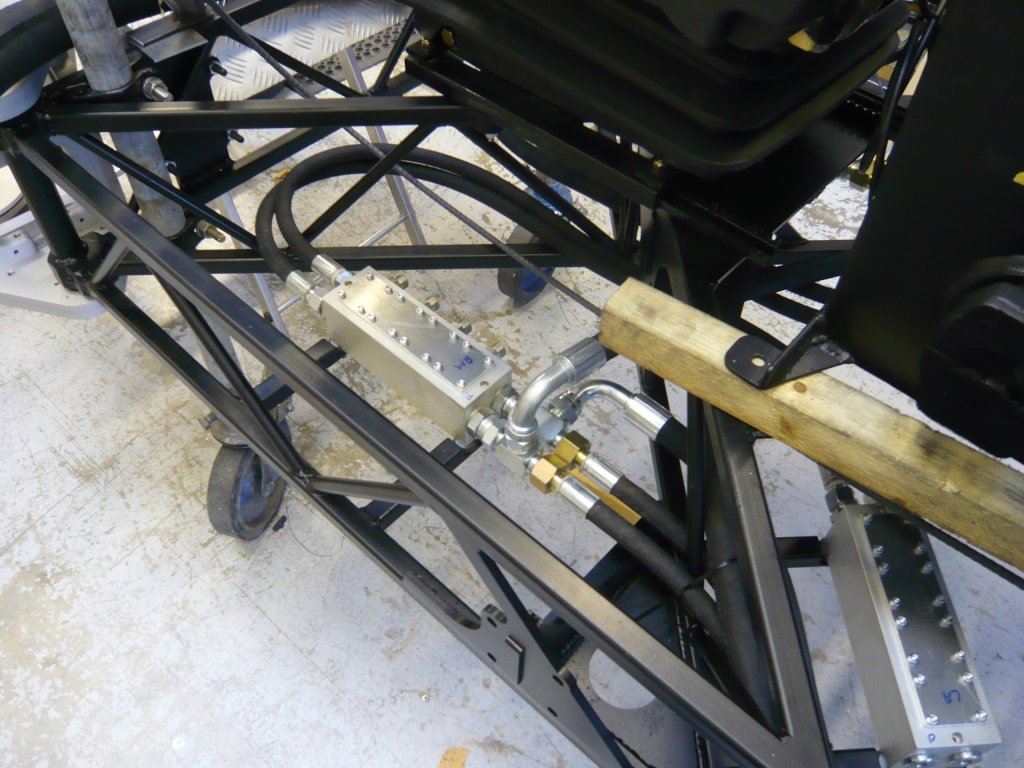
The unit is working our pretty well, I have the test leg rigged to the Mantis power pack via two 5 meter 3/4" hydraulic lines, this means I have been able to give the engine/power pack a good test while tweaking software on the test leg. I have a long stop lead rigged to the engine, so I go out into the unit, start the engine then run back to the warmth of my porta-cabin from where I carry out my tests. There was a large extractor fan already in one of the windows of our new unit, which turned out to be operational. This has been very useful for extracting the diesel fumes! 


I have a nice remote engine and hydraulic control unit interface running across the HexEngine TCP link so I can keep an eye on RPM, Volts, Current, Hydraulic pressure, Flow etc.. I can also shut down the engine remotely so I don't need to use the E-Stop. The remote shutdown first drops the hydraulic pressure to 0, then sends a shutdown message over the CANbus warning all the sub-systems a shutdown is imminent, currently after  3 seconds the engine stops. This is the same automatic shutdown sequence that occours if there is an engine error or hydraulic problem.

UBIQUITI Bullet 2
I've added a high gain antenna and weather poof WiFi access point system (UBIQUITI Bullet 2) to the Mantis, currently this forms the link from my control station in the porta-cabin to the HexEngine, however, eventually the control station will be on-board, so the WiFi link will be used for remote monitoring/control. The bullet 2 has performed fairly well so far, although it does take about 20 seconds to boot, and on a couple of quick power cycles has failed to boot altogether. The Bullet 2 takes its power over the Ethernet wires, POE, I added POE to the Ethernet plug on the hexEngine, unfortunately I forgot  this fact and plugged the HexEngine back into my Belkin wireless router, which now no longer works and has that acrid burnt component smell! I must remember to remove this feature from the HexEngine before I do more damage, I will inject power to the Bullet via a junction box. It will be interesting to see what kind of range could be acheived in open field with the bullet, although i will require another bullet or similar high gain system at the monitoring/control station to get any real benefit.

Sun Cetop3 bodies with cartridges installed.
All of the Sun Hydraulics calves arrived this week, so I spent one afternoon inserting the 60 cartridges into the manifolds, at least thats one tedious job out of the way, and ready for when the Bosch valves arrive to be added to the main cetop manifold. Bosh valves should arrive about 9th December. Hopefully this cold snap will have moved on by then so I can get out into the main workshop and fit the valves, the workshop is currently sitting at a consistent 2 Celsius.

Grayhill 6.5" Display

I have made a decision with regards to which operator interface to use for the mantis, I have had my eye on one of these Grayhill displays since early this year. I made contact with Grayhill some time ago to see if they could offer some kind of in-kind sponsorship, and to find out about the supported OS. I have to say they weren't too helpful, plus the Linux OS is not yet supported, so for now CE is the only supported system. I then recently got in touch with Howard Bristow from EAO who are the UK distributor for Grayhill, he very kindly brought a display to the office so that I could see it inaction. Its very nicely built, and looks like it could take the rugged environment which was encouraging. Its a bit slow to boot, again around 20 seconds, but this may be able to be improved, or when the Linux version is released maybe switch.. any way, EAO have loaned me a display so that I can try it out for a while before I buy. The only thing is that this display is the non-touch screen version which I will definitely need, so I will just use a mouse for now. 

Grayhill CANbus Display

Grayhill also do a nice LCD CANbus display with a few buttons, perfect for the ECU which I have already built, but much more rugged than the display I am using which has already failed once due to a dry solder joint on the base board. I may swap to the Grayhill solution some time in the future.

Wednesday 24 November 2010

Coxa Rams

I decided to check if the coxa rams fit as designed, the answer is yes,, and no! The front and back rams are fine, but the middle ram has a clashing issue with part of the frame. I sat puzzling over this for some time, and went back to the 3D cad model and studied it for the same clash.


In the model sure enough there is no problem, but on the machine there is a clash of at least 3 to 5mm. So I started measuring everything.. and comparing to the model. Again, averting looked spot on.. that was until I measured the diameter of the ram, yup, the ram is 60mm diameter, and the 3d model is 50mm diameter. Hmm, not sure why when or how that happened, but there you go, it did! Nothing the grinder wont fix :).


The rams look great when they are in place, they break up the square shape of the chassis.

Monday 25 October 2010

The BIG move

This is our last week in Wokingham, as such we moved the Mantis to its new location in Romsey today. It was an early 6:30 start as we wanted to get the truck free by 12:30, half a days rent.

We start to empty the workshop in preparation for the Hiab
Definitely time to move, as we couldn't move in our workshop!

The Hiab arrives.
On goes the Mantis, weighing in at 1450Kg in its current sate.

The rest of the kit is loaded up.
And we're ready to leave.
The Mantis is carefully craned in to the new unit.
And finally gets to stretch its legs.

Thursday 7 October 2010

More feet..

Our stack of feet is piling up, plus we have nearly found a suitable off the shelf gaiter for the ball joint (well done dad!), however, it would require some modification for a good fit.


Coxa Landing Foot

We decided today that the simplest thing to do for the landing feet for the coxas, was to add a delrin disk to the bottom of each coxa, concentric to the axis. The disk is essentially sacrificial, but should last a fair while, as the only time it would take any abrasion would be swinging the coxa back to neutral after a non-standard power down.. or a collision!

Encoder Protection

Josh has fitted bot the back legs, including the assembly of the encoder protection caps, still not sure it is enough, I wonder if an additional ring is required half way up. Still, plenty good enough for now!

Wednesday 29 September 2010

FlowHUB

Webtec FlowHUB
Having spent some considerable time figuring out how to use the two System 20 flow sensors I purchased some time ago, to monitor the flow through the system I then came across Webtecs new FlowHUB. Essentially it is exactly what I need in one device, and with built in electronics and sender. It also measures temperature, but unfortunately does not send the temperature signal.

So I stood looking and worrying about my System 20 Christmas tree, and though why not give Webtec a ring and find out just how much one would set us back. Well you can imagine they aren't cheap, however, having explained our application to Webtec, they gave us a very healthy discount as well as allowing me to return a temperature sensor to them that I had recently bought in part exchange for the FlowHUB and as its a new product some operational feedback to Webtec.

Now I just have to keep my fingers crossed that it will fit in without causing too much of an issue with hose lengths, but even if I have to have a couple of hoses re-made, it s allot easier than trying to get the four pressure transducers on the system 20 configuration to work!

To the right of this image you can see the two System 20 sensors I hope the FlowHUB will replace.

Monday 27 September 2010

Large Hydraulic Fittings!

This is the largest hydraulic fitting on the machine, a 2" SAE flange fitting, its a beast! I picked up the fitting from Roger at Unimaster so we can measure up our suction hose.

Tuesday 21 September 2010

More Plumbing

Lots more head scratching and measuring. I think I may have found a way to route the large 1.5" return line under the chassis back to the tank, rather than coming out of the engine cowling and round the main A frame. Unfortunately I think the main 2" suction line will have to go round the A frame, due to our hydraulics rep telling me not to use any elbows on suction lines! Also go the cooling system plumbed in and tidied up.


My next job is to get the pump pressure control circuit sorted out, I think I have found a good place for the proportional pressure relief valve, assuming that the coxa ram lines don't interfere.

Wednesday 15 September 2010

Break Time!

Taken from the time lapse camera.


I guess this could be classed as product placement... however, when watching the time lapse footage at 25fps, its more like subliminal advertising :)

Tuesday 14 September 2010

Chassis Plumbing

Its been a while since my last post.. Josh has finishing off some of the welding on the cab, but unfortunately has come down with pneumonia! So I am on my own for a couple of weeks. During this time I have been working out the hose arrangement within the chassis.


First of the manifolds were added, with the 4 position cetop 3 blanking plates I made up. Next a position for the main check valve, pressure relief and to UCC sensors, these were all joined together with a 4 way female adaptor, turning into a bit of a Xmas tree!


I have been getting the hoses made up at hosemaker.com, also know as Unimaster, Roger at Unimaster has been a great help, even coming to visit with a few words of wisdom!

Friday 10 September 2010

Manifolds are prepared for installation


The manifolds have been capped with my CNC cut 4 way cetop 3 blanking plates and the fittinggs have been torqued up ready for installation to the chassis. The blanking plates are 5mm 6063 Aluminium with nitrile O rings fitted in recesses on the mounting face. we will be able to run the system with these blanking plates in place until we have the valves to fit.

Wednesday 25 August 2010

CANBus ECU

Now I'm getting into the CAN bus I can really see the benefits, actually I could always see the benefits, I just couldn't find a free block of time to tackle the learning curve. Anyway, I have also added CAN connectivity to the ECU, again I had already designed in the necessary hardware, so all that was need was to add the firmware to the dsPIC code. Having the ECU on a CAN bus is going to be really useful, as it means I can tell the HexEngine when the Engine is running, and when the system is at pressure, or for example when the Engine is about to power off due to loss of oil pressure! For testing purposes I added a page to the VIC-E Control utility to display the engine status.


My last CAN hurdle, which no doubt will be the hardest is to get the Peak PC104 CAN card I have ordered installed and operational within the HexEngine Linux system.. this no doubt like all things Linux too me will not be as simple as one might hope. But for now its off to France for a long weekend break.

Tuesday 24 August 2010

The CANBus Plunge!

After spending some time trying to get the communications running better on the valve controller boards (VIC-E) which were using a RS485 multi-drop serial bus at 921600bps, and my own protocol, I finally took the plunge and switched to using a CAN bus. I had made the pcbs with the necessary CAN hardware, so it was just a case of getting my head around the CAN bus protocol and deciding how I was going to use it on the Mantis.


I ordered up a USB CAN converter, a pretty cheap unit from www.canusb.com (Blue device in picture above). Then I re-programmed one of the VIC-E units to simply transmit a message on the bus. It wasn't long before I had some satisfactory results, and after spending the rest of last week and the weekend working on the CAN / VIC-E conversion its pretty much done.To simplify things, I have left the configuration of VIC-E under RS485 control, and the position and feedback via CAN. This means that to change PID settings I plug in a USB to 485 converter to the VIC-E, change settings and can test the output result by driving the valve through the CAN bus interface.

I have written a new windows application to control the valves via the CAN bus, and changed the existing windows app that usees the RS485 bus for configuration.

CANBus Debug View